I was standing in my kitchen on a cold December night, half‑asleep, when the smoke alarm decided to join the holiday choir. My first attempt at a classic gingerbread bar had turned into a charcoal slab that could double as a doorstop. I stared at the blackened mess, laughed, and dared myself to reinvent the whole thing. That disastrous moment sparked a fire—literally and figuratively—that led me to the ultimate version of Christmas Cookie Bars. I promised myself that the next batch would be so good, even the smoke alarm would cheer.
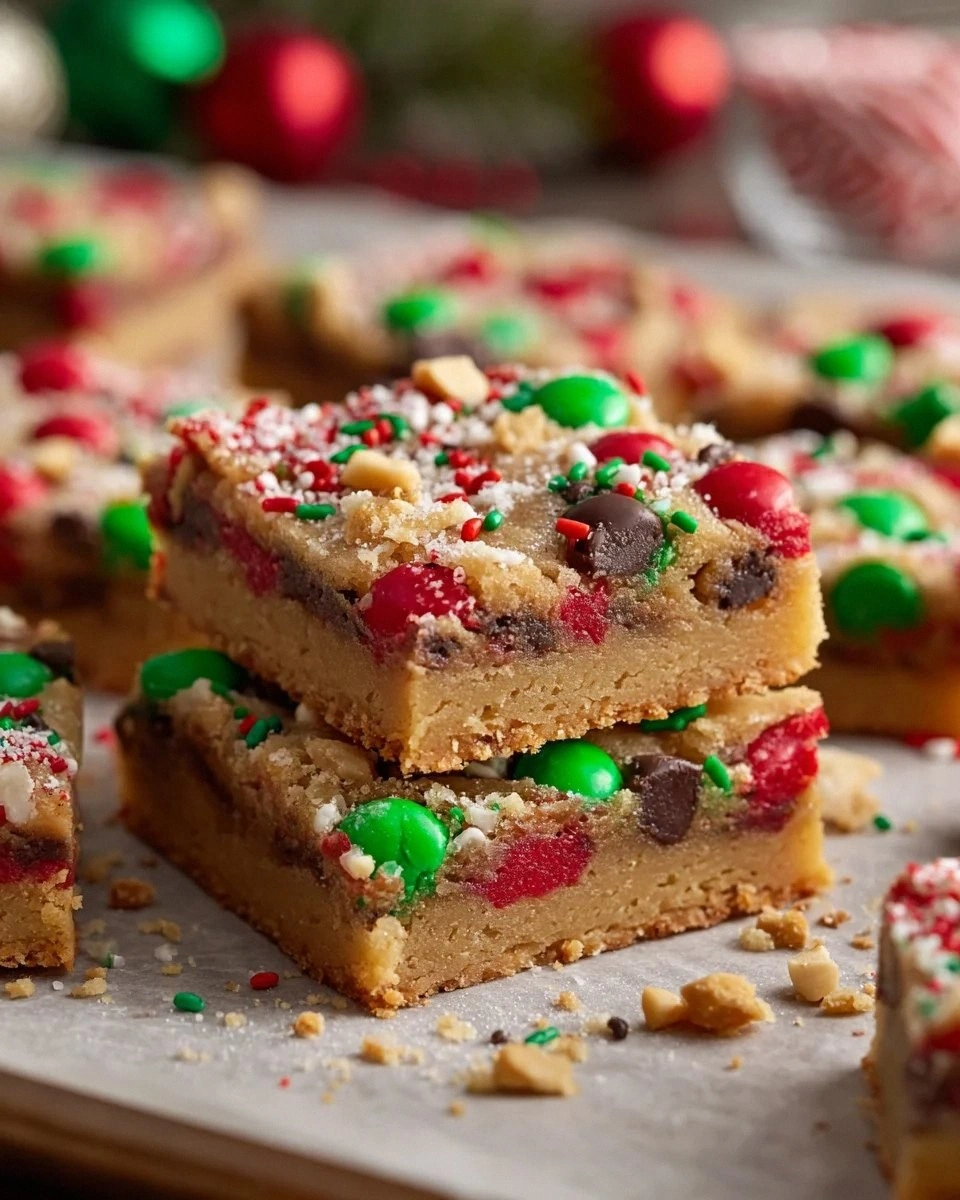
Picture this: a tray of golden‑brown bars cooling on a wire rack, the aroma of melted butter, caramelized brown sugar, and vanilla swirling like a winter perfume. The top is a riot of colorful Holiday M&Ms and glossy chocolate chips, each bite promising a crunch that sings like sleigh bells. When you break a piece, the interior reveals a chewy, buttery crumb studded with pockets of gooey chocolate that melt on the tongue faster than snowflakes on a mitten. The festive sprinkles add a pop of sparkle that looks like tiny fireworks on a night sky.
What makes this version stand out? Most recipes either over‑sweeten or leave you with a dry, crumbly texture that feels like a stale snowball. I’ve cracked the code by balancing three sugars, using melted butter for a silky mouthfeel, and folding in the right amount of leavening so the bars rise just enough to stay tender without becoming cake‑like. The secret ingredient? A splash of vanilla that ties everything together like a ribbon on a gift, plus a quick chill before baking that locks in flavor and gives you that perfect snap when you bite into the edge.
I’m about to reveal a technique that most bakers skip: chilling the dough for exactly 20 minutes before it meets the oven. This short rest allows the butter to solidify slightly, preventing the bars from spreading too thin, while also letting the sugars hydrate for that melt‑in‑your‑mouth chew. Trust me, this tiny pause is a game‑changer. Let me walk you through every single step — by the end, you’ll wonder how you ever made it any other way.
What Makes This Version Stand Out
- Flavor Fusion: The trio of sugars creates a depth that mimics a caramel‑rich holiday treat, while the vanilla adds a warm, comforting backdrop.
- Texture Triumph: A buttery, chewy interior contrasts with crisp, caramelized edges that shatter like thin ice under a gentle tap.
- Simplicity: Fewer than twelve ingredients, all pantry staples, mean you can whip this up even on a frantic Christmas Eve.
- Visual Wow: Holiday M&Ms and festive sprinkles turn each bar into a miniature celebration, perfect for gifting or Instagram.
- Crowd Magnet: I dare you to taste this and not go back for seconds; even the pickiest kids will beg for more.
- Ingredient Quality: Using real butter (not margarine) and high‑quality chocolate chips ensures a richness you can taste in every bite.
- Method Magic: The chill‑then‑bake technique prevents spreading and guarantees a uniform, bakery‑grade crumb.
- Make‑Ahead Potential: These bars keep beautifully for up to a week, making them ideal for stocking stuffers or party prep.
Inside the Ingredient List
The Flavor Base
Unsalted butter is the star of the show! It adds richness and a lovely texture. Make sure it’s melted for even mixing, because cold butter will clump and create uneven pockets of flavor. If you substitute margarine, expect a bland, rubbery finish that will ruin the whole vibe. Pro tip: Use European‑style butter with at least 82% fat for a buttery depth that feels like a hug in every bite.
Brown sugar brings a deep, caramel‑like flavor that pairs beautifully with the festive ingredients. Its moisture content keeps the bars chewy, while the molasses notes add a subtle hint of holiday spice. Skipping it for white sugar will make the bars too sweet and dry, stripping away that comforting richness. If you’re out of brown sugar, a mix of white sugar and a tablespoon of molasses works as a decent stand‑in.
Granulated sugar balances the sweetness and helps with the crisp edges. It caramelizes during baking, giving those golden‑brown borders that crackle like fresh snow underfoot. Too much of it, however, will lead to a hard, crunchy texture that’s more biscuit than bar. Use a fine‑grained sugar for a smoother melt.
The Texture Crew
All‑purpose flour provides the backbone of the recipe, offering structure while still allowing a tender chew. If you swap in cake flour, the bars will be too soft and may spread too much; whole‑wheat flour will make them dense and earthy, not the festive lightness we crave. For a gluten‑free version, blend rice flour with a tablespoon of xanthan gum per cup of flour.
Baking soda is the little leavening agent that helps the bars rise slightly, making them fluffy without turning them into a cake. Over‑using it will give a metallic aftertaste, while omitting it results in a flat, dense slab. Always sift it together with the flour to ensure even distribution.
A pinch of salt enhances the sweetness and rounds out the flavors, acting like the conductor of an orchestra. Too much will dominate the delicate chocolate, too little will leave the sweetness flat. Use fine sea salt for the best dissolve.
The Unexpected Star
Holiday M&Ms add a burst of color and a crunchy chocolate shell that contrasts with the soft interior. They’re the visual fireworks that make these bars instantly recognizable as a holiday treat. If you can’t find the holiday‑themed ones, regular M&Ms work, but consider adding a few red and green candy-coated chocolates for the same festive flair.
Chocolate chips—dark or milk—lend a rich chocolatey goodness to each bite. Dark chocolate adds a sophisticated bitterness that balances the sugars, while milk chocolate amplifies the sweet, comforting vibe. Avoid chocolate chunks that are too large; they can sink and create uneven pockets.
Festive sprinkles are the final flourish, adding a whimsical sparkle on top. They melt slightly during baking, creating a subtle crunch that’s both decorative and tasty. If you’re allergic to the typical sugar‑based sprinkles, try a drizzle of white chocolate for a glossy finish.
Everything's prepped? Good. Let's get into the real action…
The Method — Step by Step
Preheat your oven to 350°F (175°C) and line a 9×13‑inch baking pan with parchment paper, leaving an overhang on the sides for easy lift‑out. This step is crucial because the parchment acts as a built‑in non‑stick surface and helps you slide the finished bars out without crumbling. While the oven heats, give yourself a moment to sip a hot cocoa and imagine the smell of fresh‑baked cookies filling the house. The anticipation is half the fun, and the heat will soon turn your butter into a fragrant, golden pool.
In a medium saucepan, melt the unsalted butter over low heat. Once melted, remove from heat and stir in the brown sugar and granulated sugar until the mixture looks glossy and the crystals have dissolved. This is the moment of truth: you should hear a faint sizzle as the sugars meet the butter, and the scent should be reminiscent of a caramel shop on a cold night. Let the mixture cool for about two minutes—this prevents the eggs from cooking when they’re added.
Add the eggs one at a time, whisking vigorously after each addition. Then stir in the vanilla extract. The batter should become smooth, thick, and slightly glossy—think of a thick pancake batter that clings to a spoon. Watch Out: If you over‑whisk, you’ll incorporate too much air, leading to a cakey texture later on. Keep the motion steady and stop as soon as everything is fully combined.
In a separate bowl, whisk together the flour, baking soda, and salt. This dry blend ensures the leavening is evenly distributed, preventing any bitter pockets. Once combined, gently fold the dry ingredients into the wet mixture using a spatula. The dough will look slightly shaggy at first, then come together into a cohesive, buttery mass.
Kitchen Hack: Use a rubber spatula to scrape the sides of the bowl; this reduces waste and ensures every crumb is incorporated.Now fold in the chocolate chips, Holiday M&Ms, and half of the festive sprinkles. The dough should be studded with colorful flecks that look like a Christmas tree after a snowfall. Be gentle; over‑mixing at this stage can cause the chocolate to melt into the batter, losing those delightful pockets of gooeyness.
Spread the dough evenly in the prepared pan, using the back of a spoon or your hands (dipped in a little butter to prevent sticking). Press it down firmly, but not so hard that you flatten the air pockets you just created. The surface should be smooth, with a slight ridge around the edges—this ridge will become the crispy border we all love.
Chill the pan in the refrigerator for exactly 20 minutes. This short rest solidifies the butter just enough to keep the bars from spreading too much during baking. While you wait, set the table with festive plates; the anticipation builds, and you’ll notice the dough firming up, which is a good sign.
Bake for 30‑35 minutes, or until the edges are a deep golden‑brown and a toothpick inserted into the center comes out with just a few moist crumbs. You’ll know it’s done when the top is lightly cracked and the sprinkles have settled into a glossy finish. Resist the urge to open the oven door early; every time you do, the temperature drops and the bars can collapse.
Remove from the oven and immediately sprinkle the remaining festive sprinkles over the hot surface. The residual heat will melt them slightly, creating a subtle sparkle. Let the bars cool in the pan for 10 minutes, then use the parchment overhang to lift the whole slab onto a wire rack. Once completely cool, cut into squares—preferably with a sharp knife warmed in hot water for clean cuts.
That's it — you did it. But hold on, I've got a few more tricks that'll take this to another level…
Insider Tricks for Flawless Results
The Temperature Rule Nobody Follows
Never bake these bars straight from the freezer. Cold dough spreads too quickly, resulting in thin, uneven bars. Instead, let the dough rest at room temperature for 10 minutes after chilling, then pop it in the oven. This small temperature adjustment ensures the butter melts gradually, giving you that perfect, chewy interior with crisp edges. I once tried skipping this step, and the result was a sad, flat pancake—lesson learned.
Why Your Nose Knows Best
Rely on aroma, not just the timer. When the edges start to smell nutty and the top releases a caramel scent, the bars are nearing perfection. If you have a kitchen timer that beeps, ignore it and trust your senses. This sensory checkpoint is why my friends always say my bars smell “like Christmas morning” even before they’re sliced.
The 5‑Minute Rest That Changes Everything
After removing the pan from the oven, let the bars rest uncovered for five minutes before sprinkling the final sprinkles. This short pause allows the steam to escape, preventing sogginess on the bottom, while the surface remains tacky enough to hold the sprinkles in place. Skipping this rest leads to a wet underside and a less satisfying snap when you bite.
Cool on a Wire Rack, Not in the Pan
Transferring the slab to a wire rack cools it evenly, preventing the bottom from becoming soggy due to trapped steam. If you leave it in the pan, the residual heat continues to cook the base, which can make the texture rubbery. The rack also gives you a chance to admire the glossy finish before you cut.
Cutting with a Hot Knife
Run a sharp knife under hot water, dry it, and slice the bars. The heat prevents the knife from dragging through the soft interior, giving you clean, professional‑looking squares. A dull or cold knife will crush the bars, making them look like broken snowmen instead of festive squares.
Creative Twists and Variations
This recipe is a playground. Here are some of my favorite ways to switch things up:
White Chocolate Cranberry Bliss
Swap the chocolate chips for 1 cup of white chocolate chips and fold in ½ cup dried cranberries. The tartness of the cranberries balances the sweetness of the white chocolate, creating a flavor reminiscent of a holiday cheese board. Perfect for guests who love a hint of fruit.
Peppermint Mocha Crunch
Add 1 teaspoon of peppermint extract and replace half of the chocolate chips with crushed peppermint bark. The minty bite cuts through the buttery base, delivering a refreshing twist that feels like a coffee shop treat on a snowy morning.
Nutty Caramel Delight
Stir in ¾ cup toasted chopped pecans and drizzle caramel sauce over the top after baking. The nuts add a satisfying crunch, while the caramel introduces a silky layer of sweetness that elevates the bars to dessert‑first status.
Spiced Chai Fusion
Mix 1 teaspoon of chai spice blend (cinnamon, cardamom, ginger, cloves) into the dry ingredients. The warm spices give the bars an exotic depth, making them a conversation starter at any holiday gathering.
Gluten‑Free Almond Flour Version
Replace the all‑purpose flour with an equal amount of almond flour and add ½ teaspoon of xanthan gum. The bars become slightly denser but retain a buttery crumb, perfect for friends with gluten sensitivities.
Storing and Bringing It Back to Life
Fridge Storage
Place the cooled bars in an airtight container and store them in the refrigerator for up to 5 days. The cool environment keeps the butter from going rancid and preserves the chewy texture. If you notice any condensation, simply pat the tops with a paper towel before resealing.
Freezer Friendly
Wrap the entire slab in a double layer of parchment paper, then seal it in a freezer‑safe zip‑top bag. They’ll stay fresh for up to 3 months. When you’re ready to enjoy them, thaw at room temperature for 30 minutes, then give them a quick 5‑minute warm‑up in a 300°F oven to revive that fresh‑out‑of‑the‑oven melt.
Best Reheating Method
Add a tiny splash (about a tablespoon) of water to the bottom of the container before microwaving for 20 seconds. The steam revives the interior chewiness without drying out the edges. Alternatively, a brief stint in a preheated oven (350°F for 5 minutes) restores the crispness of the outer crust.