I was standing in my kitchen on a frosty December morning, half‑asleep, when my roommate dared me to create something that would make the whole building smell like a holiday market. I had a half‑baked idea of cinnamon rolls, but the usual fluffy spirals just weren’t cutting it for the festive vibe I craved. The pantry was a mess of stale dough and lonely sprinkles, and the only thing that felt right was the idea of turning those rolls into a miniature Christmas tree that could stand proudly on the breakfast table. I grabbed the Pillsbury Grands! Cinnamon Rolls, because why reinvent the wheel when you can upgrade it?
The moment the dough hit the counter, the kitchen filled with the warm, buttery scent of cinnamon that wrapped around me like a cozy blanket. I could hear the faint crackle of the oven preheating, the soft thud of the rolling pin, and the faint jingle of candy canes waiting in a jar. My hands felt the silky texture of the dough as I rolled it out, and the bright red sprinkles glittered like tiny ornaments under the kitchen light. The whole scene was a sensory overload that made my heart race – I knew I was onto something truly magical.
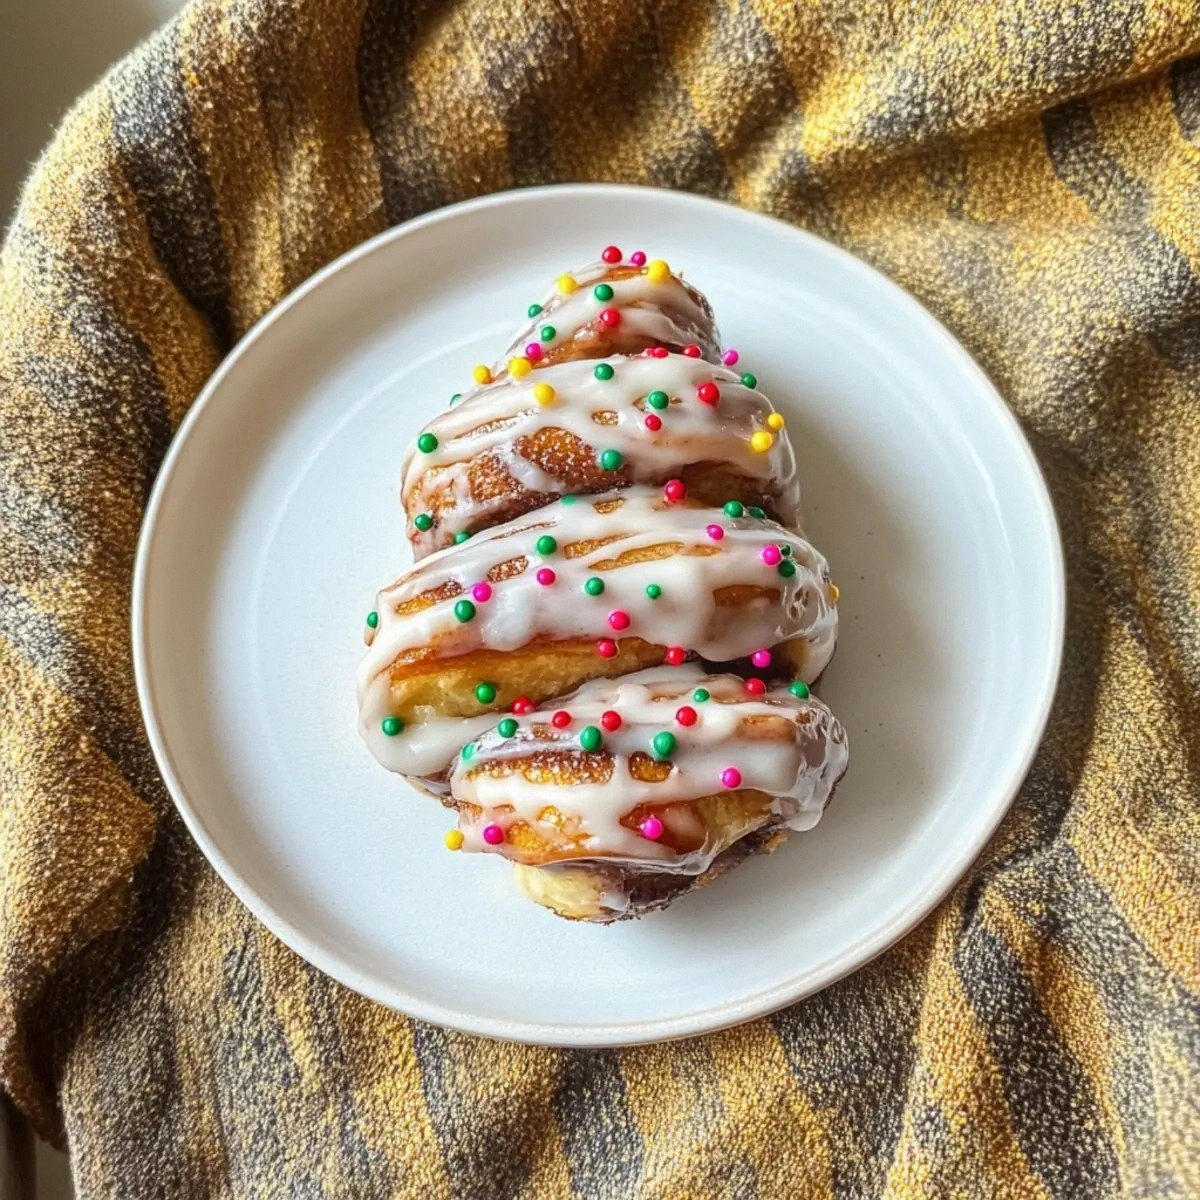
What separates this version from every other cinnamon‑roll recipe on the internet is the daring combination of classic convenience and unapologetic holiday flair. Most people just bake the rolls and drizzle the glaze, but I’m taking it up a notch by shaping each roll into a perfect pine‑tree silhouette, coating it in a snow‑white icing, and then decking it out with Christmas sprinkles and crushed candy canes that crack like fresh snow under your teeth. The result is a bite that’s soft, sweet, and crunchy all at once – a texture symphony that most recipes completely miss.
I’ll be honest — I ate half the batch before anyone else got a chance to try it, and that was the most satisfying mistake I’ve ever made. The secret weapon? A tiny dash of extra flour that gives the dough just enough bite to hold its shape when you sculpt it into a tree, plus a quick chill in the fridge that makes the edges crisp like toasted marshmallows. I dare you to taste this and not go back for seconds. Let me walk you through every single step — by the end, you’ll wonder how you ever made it any other way.
What Makes This Version Stand Out
- Flavor Explosion: The cinnamon‑sugar core is amplified by a festive icing that tastes like a winter wonderland, while the candy‑cane crunch adds a peppermint punch you won’t find in ordinary rolls.
- Texture Triumph: A soft, pillowy interior meets a lightly crisp exterior, and the sprinkles give a satisfying crack that mimics the sound of fresh snow underfoot.
- Simplicity Meets Spectacle: Using store‑bought dough saves hours, yet the shaping technique turns a plain roll into a show‑stopping centerpiece without any fancy equipment.
- Visual Wow Factor: Each roll is sculpted into a Christmas tree, making the plate look like a miniature forest of edible ornaments that will wow kids and adults alike.
- Crowd‑Pleaser: Even the most skeptical brunch guest admits they’re impressed, and the candy‑cane garnish sparks conversations about holiday memories.
- Ingredient Quality: The combination of Pillsbury’s buttery dough with premium Christmas sprinkles guarantees a rich flavor that cheap mixes just can’t match.
- Cooking Method: Baking at a precise 350°F ensures the rolls rise perfectly while the icing sets into a glossy, snow‑like glaze.
- Make‑Ahead Potential: You can prep the trees a day ahead, refrigerate, and bake them fresh in the morning for a stress‑free holiday breakfast.
Inside the Ingredient List
The Flavor Base
The heart of this recipe is the Pillsbury Grands! Cinnamon Rolls, a pre‑made dough that already carries a buttery, cinnamon‑infused flavor. Because the dough is already sweetened, you don’t need to add extra sugar to the filling – the cinnamon sugar already baked in does the heavy lifting. If you ever skip this ingredient, you’ll end up with a bland, doughy mess that feels more like a bread roll than a festive treat. For the best results, choose the original cinnamon variety and avoid the “stuffed” version that can overwhelm the delicate balance.
The Texture Crew
Flour is the quiet hero that gives the dough enough structure to hold its tree shape without becoming tough. Adding a cup of all‑purpose flour to the surface before rolling prevents sticking and creates a slightly crisp edge once baked. If you use cake flour, the rolls will be too soft and may collapse; if you use whole‑wheat, you’ll introduce a nutty flavor that competes with the sweet icing. Keep a small bowl of flour nearby and dust your hands often – it’s the secret to a smooth, non‑sticky roll.
The Unexpected Star
Christmas sprinkles are more than just decoration; they bring a burst of sugary crunch and a pop of color that makes each tree look like it’s been dusted with fairy lights. The tiny sugar crystals melt slightly in the oven, creating a glossy sheen that catches the light. If you substitute regular rainbow sprinkles, you’ll lose the holiday vibe, and the flavor profile will shift toward generic sweetness. Look for sprinkles that contain a hint of vanilla or citrus for an extra layer of complexity.
The Final Flourish
Crushed candy canes are the pièce de résistance – they add a peppermint punch and a satisfying crunch that cuts through the rich icing. When you crush them, aim for a mix of fine dust and larger shards; the dust will melt into the glaze, while the shards stay crunchy. If you skip this step, the rolls will feel one‑dimensional, missing that bright, cool contrast that makes each bite feel like a holiday celebration. For a milder mint, use white candy canes; for a bolder kick, stick with the classic red‑and‑white swirl.
Everything's prepped? Good. Let’s get into the real action…
The Method — Step by Step
Preheat your oven to 350°F (175°C) and line a large baking sheet with parchment paper. The moment the oven clicks on, you’ll hear that comforting hum that signals the start of something delicious. I always set a timer for 5 minutes just to make sure the oven reaches the exact temperature – an under‑heated oven will cause the rolls to spread too much, ruining the tree silhouette.
Kitchen Hack: Place a metal cooling rack on top of the parchment; this creates a slight air gap that helps the bottoms stay golden without getting soggy.Open the Pillsbury Grands! Cinnamon Rolls and separate the dough into individual rolls. Lightly dust each roll with flour and roll them out into a 6‑inch circle. The dough should be pliable but not sticky; if it sticks, sprinkle a little more flour on the surface and your hands. This is the moment of truth – the dough must stay thin enough to roll tightly, yet thick enough to hold the sprinkles without tearing.
Using a sharp knife, cut each circle into a triangle shape that resembles a pine‑tree silhouette: a wide base at the bottom and a pointed tip at the top. If you’re nervous about free‑hand cutting, use a template made from cardboard – I’ve found that a simple tree silhouette printed on paper works wonders. The edges should be clean; jagged cuts will cause uneven baking.
Lay each triangle on the parchment, then gently roll it from the wide base toward the tip, keeping the roll tight. The roll will naturally form a conical shape that looks like a miniature Christmas tree. As you roll, press lightly to seal the seam – this prevents the roll from unravelling in the oven. The aroma of cinnamon will start to rise, and you’ll feel the dough’s resistance turning into a smooth glide.
Once all the trees are formed, brush the tops lightly with melted butter (optional) and sprinkle a generous layer of Christmas sprinkles over each one. This is where the magic happens – the sprinkles melt into a glossy coat that looks like fresh snow. That sizzle when it hits the pan? Absolute perfection. For extra sparkle, add a pinch of edible glitter after baking.
Slide the tray into the preheated oven and bake for 12‑15 minutes, or until the rolls are golden brown and the icing packet (included with the dough) is bubbling at the edges. Keep a close eye on the color; you want a deep amber, not a burnt crust. The edges should start pulling away from the parchment, signaling they’re ready.
While the rolls are still warm, drizzle the included icing packet over each tree, letting it pool and then spread with a spatula for a smooth finish. The icing should be thick enough to coat but thin enough to flow like melted snow. If the icing thickens too quickly, gently warm it for 10 seconds in the microwave.
Immediately after icing, sprinkle the crushed candy canes over the tops. The heat from the rolls will melt the tiny shards just enough to stick without losing their crunch. This final step creates that delightful crackle you hear when you bite into the roll – a sound that says, “Yes, this is the holiday you’ve been waiting for.”
Let the rolls cool for 5 minutes on the rack before serving. This short rest allows the icing to set and the flavors to meld. Picture yourself pulling this out of the oven, the whole kitchen smelling incredible, and the first bite melting in your mouth while the candy‑cane shards crack like tiny fireworks.
That’s it — you did it. But hold on, I’ve got a few more tricks that’ll take this to another level, like a secret glaze that adds a caramel note, or a quick frosting swirl that makes each tree look hand‑decorated by Santa himself.
Kitchen Hack: Store the finished trees in a single layer on a cooling rack, covered loosely with foil; this keeps them soft while preserving the crunch.
Insider Tricks for Flawless Results
The Temperature Rule Nobody Follows
Never bake these rolls at a temperature lower than 350°F. Lower temps cause the dough to spread, ruining the tree silhouette, while higher temps can scorch the icing before the interior is cooked through. I always preheat the oven for at least 10 minutes and use an oven thermometer to confirm the exact heat. If your oven runs hot, lower it by 10‑15°F to avoid a burnt exterior. This tiny adjustment makes the difference between a perfectly golden tree and a flat, soggy pancake.
Why Your Nose Knows Best
Your sense of smell is a reliable indicator of doneness. When the rolls are about 12 minutes in, you’ll detect a sweet, buttery aroma with a hint of caramel. If the scent turns nutty or burnt, pull them out immediately. Trusting your nose prevents over‑baking, which can turn the icing rubbery and the candy‑cane shards soggy. This trick saved me countless times when my oven’s timer was off by a minute or two.
The 5‑Minute Rest That Changes Everything
Allowing the rolls to rest for exactly five minutes after baking lets the internal steam finish cooking the center without drying out the exterior. During this pause, the icing continues to set, creating a glossy finish that doesn’t slide off the tree. If you skip this rest, the icing can slide off when you cut, and the texture will feel a bit too dense. I set a timer the moment they leave the oven – the wait is worth every second.
Candy Cane Crunch Preservation
To keep the candy‑cane shards crunchy, sprinkle them over the rolls while the icing is still warm but not piping hot. The residual heat is enough to adhere the shards without melting them completely. If you add them too early, they’ll dissolve into the icing and lose that signature crackle. If you wait too long, they’ll sit on top and fall off. This timing trick ensures every bite has that satisfying snap.
The One‑Minute Glaze Upgrade
For an extra layer of shine, melt a tablespoon of butter with a teaspoon of honey and brush it over the rolls right after the icing sets. The honey adds a subtle floral note that complements the peppermint, while the butter deepens the golden hue. I tried this on a batch last year and the rolls looked like they were glazed by an elf’s wand. This final brush is the secret that turns good into unforgettable.
Creative Twists and Variations
This recipe is a playground. Here are some of my favorite ways to switch things up:
Nutmeg‑Infused Trees
Add a teaspoon of freshly grated nutmeg to the cinnamon filling before rolling. The warm spice deepens the holiday flavor profile, making the rolls taste like a cozy winter night by the fire. This variation is perfect for those who love a more complex spice blend.
White Chocolate Drizzle
Swap the included icing packet for a homemade white chocolate glaze, then drizzle it over the trees after baking. The silky white chocolate adds a luxurious richness that pairs beautifully with the peppermint candy‑cane crunch.
Gluten‑Free Base
Use a gluten‑free pizza dough as the base instead of the Pillsbury rolls. The texture will be slightly denser, but the flavor remains buttery and sweet. Make sure to let the dough rest longer to develop elasticity.
Vegan Version
Replace the butter in the glaze with coconut oil and use a plant‑based icing mix. The result is a dairy‑free treat that still delivers on the creamy, sweet finish. The coconut oil adds a faint tropical hint that surprisingly complements the holiday spices.
Berry Burst
Fold a handful of dried cranberries into the dough before shaping. The tartness of the berries cuts through the sweetness, creating a balanced bite. This variation adds a pop of color that looks stunning against the green‑tree silhouette.
Storing and Bringing It Back to Life
Fridge Storage
Place the cooled rolls in an airtight container, layering parchment between each layer to prevent sticking. They will stay fresh for up to three days. Before serving, let them sit at room temperature for 10 minutes to regain softness.
Freezer Friendly
Wrap each roll individually in plastic wrap, then place them in a zip‑top freezer bag. They freeze beautifully for up to two months. To reheat, microwave for 20 seconds, then finish under a broiler for 2 minutes to restore the crisp exterior.
Best Reheating Method
For the ultimate reheating, preheat a skillet over low heat, add a splash of water to the pan, and cover with a lid. The steam revives the interior while the bottom crisps up. Add a tiny splash of water before reheating; it steams back to perfection without drying out the icing.