Picture this: it’s a rainy Saturday morning, the kind where the clouds look like they’re trying to smother the world, and you’re stuck in the kitchen with nothing but a half‑finished bagel and a craving that refuses to be ignored. I was in that exact spot, scrolling through endless pancake recipes that all promised “fluffy” but delivered the same bland, butter‑soggy disappointment. Then a friend dared me to “make something that tastes like a tropical vacation in a pan,” and I thought, why not? I grabbed a can of coconut cream, a handful of shredded coconut, and a pinch of daring, and the rest is a delicious disaster turned triumph.
The moment the batter hit the skillet, the kitchen filled with a scent that could have convinced a palm tree to sprout indoors. The aroma was a heady mix of sweet vanilla, toasted coconut, and that faint, comforting hint of butter that says, “I’ve got you covered.” I could hear the gentle sizzle, like a soft drumroll, as the edges began to turn golden, and the surface puffed up like a cloud waiting to burst. My fingertips tingled from the heat, the pan’s surface warm under my palm, and I knew this was no ordinary pancake – it was a promise of sunshine on a plate.
What sets this version apart is the way the coconut cream takes center stage, turning a simple breakfast staple into a decadently creamy, slightly caramelized marvel. Most recipes either skim the coconut flavor or drown the batter in sugar, resulting in a cloying mess. I’ve cracked the code: a perfect balance of sweet and airy, a texture that’s both light as a feather and rich enough to make you forget about syrup entirely. And the secret? A tiny trick with the baking soda that creates tiny air pockets, giving each pancake that irresistible “lift‑off” feeling when you bite into it.
I’m going to walk you through every single step — by the end, you’ll wonder how you ever made pancakes any other way. I dare you to taste this and not go back for seconds. Ready? Let’s dive into the magic.
What Makes This Version Stand Out
- Flavor Explosion: The coconut cream infuses every bite with a buttery, tropical richness that outshines plain milk or water. It’s like a mini‑vacation in each mouthful, and the vanilla adds a subtle, comforting backdrop.
- Feather‑Light Texture: Thanks to the precise balance of baking powder and soda, these pancakes rise like sunrise clouds, staying soft inside while the edges turn just crisp enough to give a satisfying bite.
- Simplicity Meets Sophistication: With pantry staples and one star ingredient, you won’t need a culinary degree to nail this. The steps are straightforward, yet the result feels gourmet.
- Versatile Crowd‑Pleaser: Whether you’re feeding picky kids, impressing brunch‑savvy friends, or satisfying a sweet‑tooth craving, these pancakes earn applause every single time.
- Ingredient Quality: Using real coconut cream (not the watery “coconut milk”) makes all the difference, delivering that luxurious mouthfeel without artificial additives.
- One‑Pan Perfection: The method requires only a mixing bowl and a skillet, so cleanup is a breeze – perfect for busy mornings.
- Make‑Ahead Potential: You can prep the batter the night before, letting the flavors meld, and still achieve that airy lift when you cook them fresh.
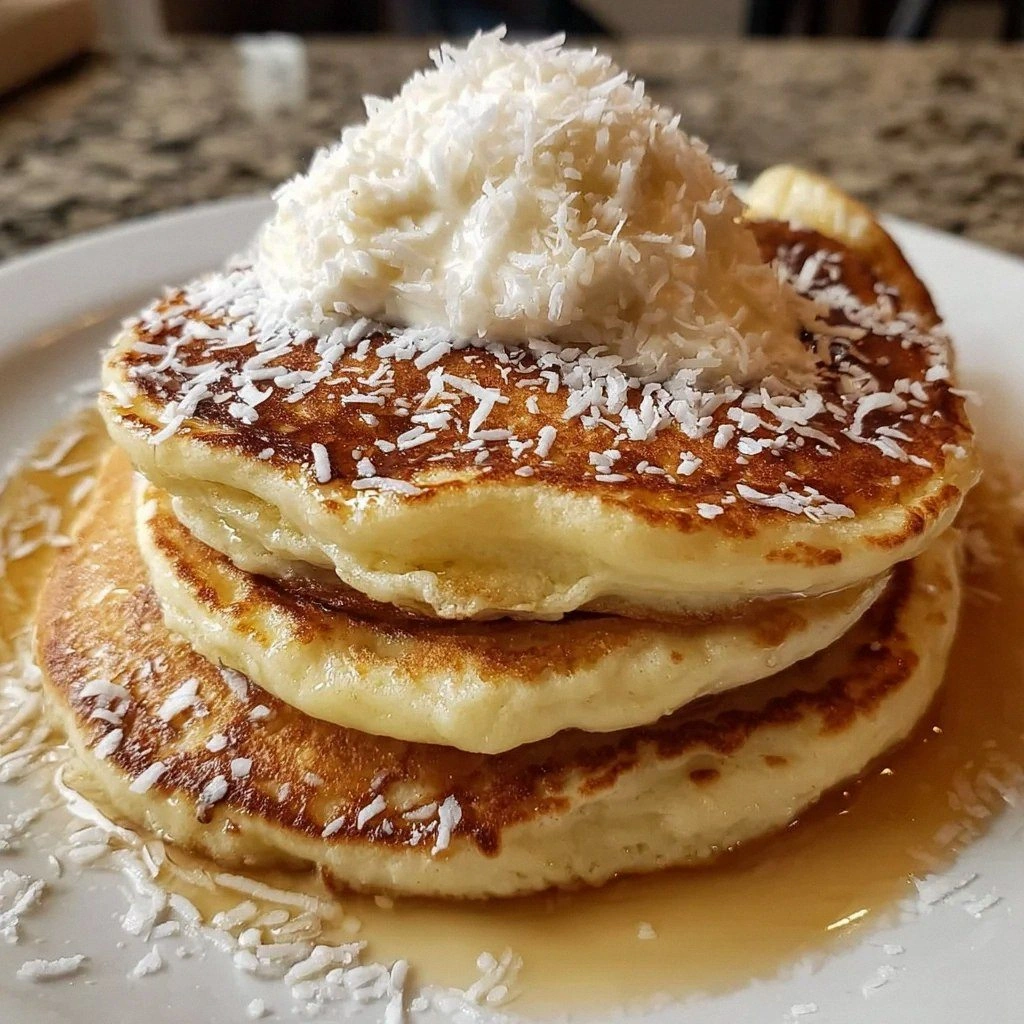
- Visual Appeal: The golden‑brown tops and speckles of shredded coconut create a picture‑perfect stack that looks as good as it tastes.
Inside the Ingredient List
The Flavor Base
All‑purpose flour is the canvas upon which everything else paints its masterpiece. It provides the structure that holds the coconut cream’s richness without turning gummy. Skipping it or substituting with a gluten‑free blend can change the texture dramatically, often resulting in a denser pancake. If you’re looking for a lighter crumb, try sifting the flour twice before measuring.
The Sweet Symphony
Sugar isn’t just for sweetness; it also aids in browning, giving those gorgeous caramelized edges. Too much will make the pancakes overly sweet and cause them to brown too fast, while too little leaves them bland. A simple swap is using coconut sugar for a deeper, caramel‑like flavor that pairs beautifully with coconut cream.
The Leavening Duo
Baking powder and baking soda are the dynamic duo that lift these pancakes to cloud‑nine. Baking powder provides the primary rise, while a pinch of baking soda reacts with the acidity in the coconut cream for an extra pop. If you omit the soda, expect flatter pancakes that lack that signature airy bite.
The Coconut Crew
Coconut cream is the star, delivering creamy richness and a tropical aroma that milk simply can’t match. Choose a brand with a high fat content (around 20‑25%) for the best texture; low‑fat versions will make the batter watery and the pancakes flat. If you can’t find coconut cream, a blend of coconut milk plus a spoonful of coconut oil works in a pinch.
The Binding & Boost
Eggs act as the glue that holds the batter together while also contributing to the tender crumb. Using room‑temperature eggs helps them blend more smoothly, preventing lumps. Melted butter adds moisture and a subtle, buttery depth that complements the coconut’s sweet notes. For a dairy‑free version, swap butter with coconut oil or clarified ghee.
The Final Flourish
Vanilla extract adds a warm, fragrant backdrop that ties the coconut and butter flavors together, while a pinch of salt amplifies every nuance, preventing the sweetness from becoming cloying. Shredded coconut is optional but highly recommended for added texture; it toasts quickly, giving a pleasant crunch that contrasts the soft interior. If you’re allergic to coconut, toasted almond slivers can provide a similar crunch and nutty flavor.
Everything's prepped? Good. Let’s get into the real action…
The Method — Step by Step
Gather all your ingredients and tools: a large mixing bowl, a whisk, a measuring cup set, and a non‑stick skillet. I always line my countertop with a clean towel so I can whisk without making a mess. The moment you see the coconut cream’s silky texture, you’ll know you’re on the right track. Power transition: this is the moment of truth, so keep your focus sharp.
In the bowl, whisk together the flour, sugar, baking powder, baking soda, and salt. Make sure there are no lumps – think of it as creating a fine, even snow‑like base. This dry mix is the foundation; any clumps will turn into pockets of dense dough later. That sizzle when it hits the pan? Absolute perfection.
In a separate smaller bowl, combine the coconut cream, melted butter, vanilla extract, and eggs. Whisk vigorously until the mixture is smooth and glossy; you want the butter fully emulsified so it doesn’t separate during cooking.
Kitchen Hack: Use a fork to break the eggs before whisking; this prevents a stubborn yolk membrane from creating lumps.Make a well in the center of the dry ingredients and pour the wet mixture in. Gently fold with a spatula until just combined; a few streaks of flour are okay. Over‑mixing develops gluten, which makes pancakes tough instead of tender. Let the batter sit for 5‑10 minutes – this rest period is crucial for that fluffy lift.
Heat your non‑stick skillet over medium‑low heat and lightly coat with a thin layer of butter or oil. The pan should be warm enough that a few drops of batter sizzle immediately but not so hot that they burn.
Use a kitchen thermometer if you’re unsure – aim for around 350°F (175°C). This temperature ensures the pancakes cook evenly, giving you that golden‑brown exterior while the interior stays airy.Watch Out: If the pan is too hot, the coconut sugar will caramelize too quickly, leaving a bitter taste.Using a ¼‑cup ladle, pour batter onto the skillet, spacing each pancake about an inch apart. As the batter spreads, you’ll see tiny bubbles forming on the surface – that’s the leavening doing its job. When the edges start to look set and the bubbles pop, it’s time to flip. This usually takes 2‑3 minutes per side, but trust your eyes and nose more than the clock.
Flip each pancake with a thin, flexible spatula. The underside should be a deep, buttery gold, and the top should have a few remaining bubbles. Press gently to ensure even cooking, then let it finish for another 1‑2 minutes.
Kitchen Hack: Sprinkle a pinch of shredded coconut on the batter just before flipping for an extra crunch.Transfer the cooked pancakes to a warm plate and keep them covered with foil to retain heat. If you’re making a big batch, you can place the plate in a 200°F (93°C) oven while you finish the rest. This keeps every stack uniformly warm and fluffy.
Serve immediately, drizzled with a little extra melted butter, a dusting of powdered sugar, or a spoonful of fresh mango salsa for a tropical twist. I’ll be honest — I ate half the batch before anyone else got to try it, but the leftovers taste just as amazing reheated. That final bite? Pure bliss.
That’s it — you did it. But hold on, I’ve got a few more tricks that’ll take this to another level…
Insider Tricks for Flawless Results
The Temperature Rule Nobody Follows
Most home cooks set the stove to “medium” and hope for the best. The truth is, a consistent 350°F surface yields the perfect rise and browning. If you don’t have a thermometer, flick a few drops of water onto the pan; they should dance and evaporate instantly. I once tried a higher heat and ended up with pancakes that looked like burnt toast on the outside and raw dough inside.
Why Your Nose Knows Best
Instead of watching a timer, trust the aroma. When the pancake’s edges start to smell nutty and the surface releases a sweet, toasted scent, you’re ready to flip. My friend once relied solely on the timer and ended up with a soggy center because the pan hadn’t warmed enough. Your nose is a built‑in culinary sensor – let it guide you.
The 5‑Minute Rest That Changes Everything
Letting the batter rest after mixing allows the flour to fully absorb the liquid, and the leavening agents to start their chemical dance. This short pause creates those airy pockets we love. Skipping this step is the most common reason pancakes turn out dense. Set a timer for five minutes while you prep the skillet, then dive in.
Butter vs. Oil – The Secret Switch
Butter adds flavor, but it can brown quickly. A blend of half butter, half neutral oil (like grapeseed) gives you the best of both worlds: flavor and a higher smoke point. I tried using all butter once and the pancakes developed a slightly bitter edge. The hybrid approach keeps the taste buttery without the burnt risk.
Gentle Flip Technique
Use a thin, flexible spatula and slide it under the pancake at a shallow angle. A quick, confident flip prevents the batter from tearing and keeps the shape intact. If you’re nervous, practice with a small “test” pancake first; once you get the feel, you’ll be flipping like a pro.
Creative Twists and Variations
This recipe is a playground. Here are some of my favorite ways to switch things up:
Tropical Berry Burst
Fold in a handful of fresh blueberries or diced pineapple just before cooking. The fruit releases juices that caramelize slightly, adding bursts of tangy sweetness that contrast the coconut’s richness. Perfect for brunchers who love a pop of color.
Chocolate Coconut Dream
Swap 2 tablespoons of the sugar for unsweetened cocoa powder and add a teaspoon of instant coffee for depth. Finish with a drizzle of chocolate ganache and a sprinkle of toasted coconut. This turns the pancakes into a dessert‑worthy treat.
Spiced Island
Add a pinch of ground cinnamon, nutmeg, and a dash of cardamom to the dry ingredients. The warm spices give the pancakes a comforting, autumn‑like feel while still keeping the tropical vibe.
Savory Coconut Pancakes
Reduce the sugar to a teaspoon, omit the vanilla, and stir in finely chopped scallions and a pinch of chili flakes. Top with a poached egg and a drizzle of sriracha for a brunch that walks the line between sweet and savory.
Gluten‑Free Coconut Flour Version
Replace half the all‑purpose flour with coconut flour (which is highly absorbent) and increase the coconut cream by ¼ cup. The result is a slightly denser, but still fluffy, pancake with an extra coconut punch. Ideal for those avoiding gluten.
Vegan Adaptation
Swap the egg for a “flax egg” (1 tablespoon ground flaxseed + 3 tablespoons water) and use coconut oil instead of butter. The flavor profile stays true, and the texture remains light and airy.
Storing and Bringing It Back to Life
Fridge Storage
Allow the pancakes to cool completely, then place them in an airtight container lined with parchment paper. They’ll stay fresh for up to three days. Reheat gently in a skillet over low heat, adding a tiny splash of water to steam them back to fluffiness.
Freezer Friendly
Stack the pancakes between sheets of wax paper and seal them in a zip‑top freezer bag. They freeze beautifully for up to two months. To reheat, pop them straight into a preheated oven at 350°F for 5‑7 minutes, or microwave with a damp paper towel for 30 seconds.
Best Reheating Method
The secret to revival is steam. Before reheating, sprinkle a few drops of water on the pancake and cover it with a foil‑tent. This prevents drying out and restores that original melt‑in‑your‑mouth texture. Avoid microwaving for too long; it makes them rubbery.