I was halfway through a cake when the batter collapsed like a bad joke—flour everywhere, frosting in the sink, and a kitchen that smelled like burnt sugar. I stared at the mess, then remembered the recipe my grandma had whispered to me over a cup of tea: a fresh raspberry layer cake that would make the whole house smell like a summer orchard. That moment of panic turned into a daring experiment, and the result was a cake that sings with berry brightness, buttery sponge, and a glaze that glistens like dew on a morning leaf. I’m not just talking about a dessert; I’m talking about a moment of triumph that you’ll want to relive every time you bake.
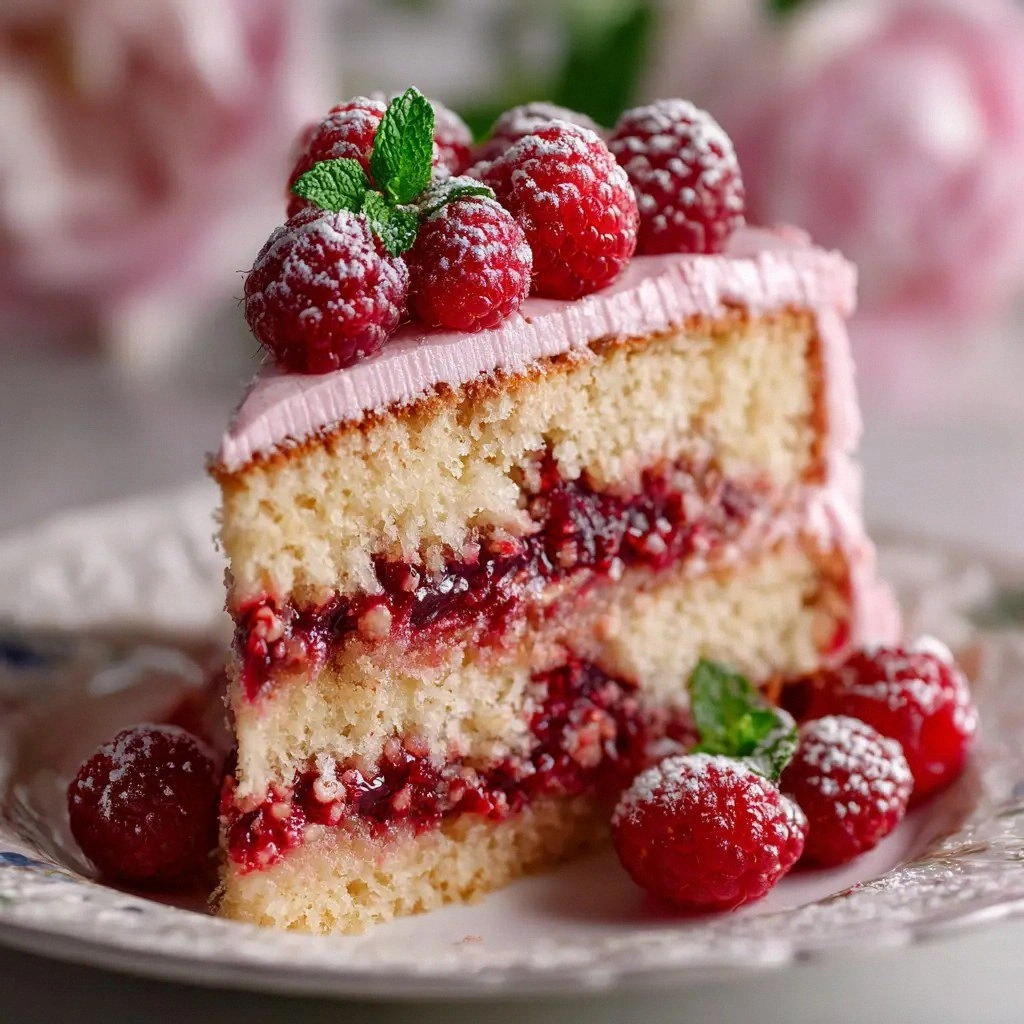
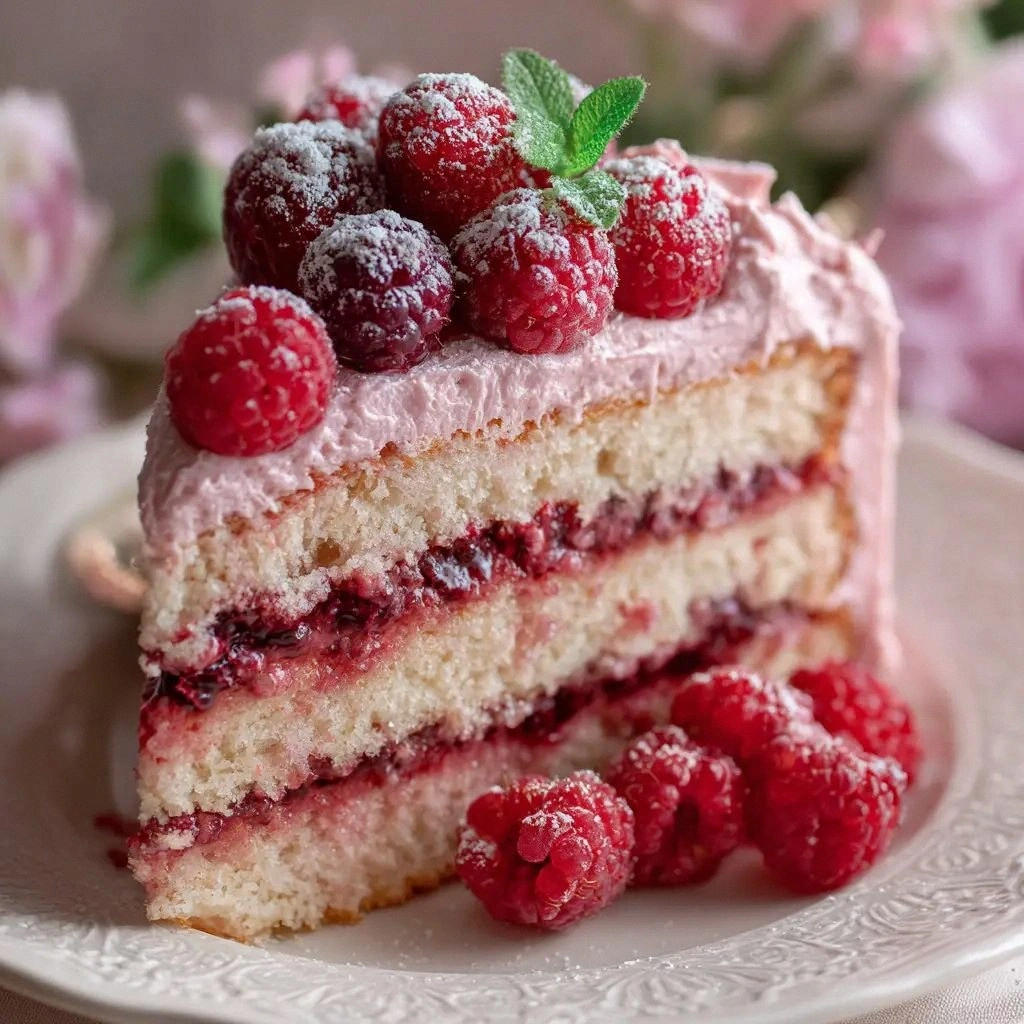
Picture the scene: a golden loaf emerging from the oven, steam curling like a ribbon of clouds, and the unmistakable scent of fresh raspberries mingling with vanilla and lemon. The first bite is a burst of sweet‑tart flavor that lands on a buttery base, followed by a silky glaze that coats the tongue like velvet. The texture is a dance of airy layers that crumble softly, yet hold together with the strength of a well‑balanced batter. The sound of the cake cooling on the wire rack is the gentle hiss of a satisfied oven, and the sight of the glossy glaze is a visual promise of indulgence. I’ve spent countless hours tweaking ratios, testing temperatures, and chasing that perfect crumb, and this version finally nails it.
What sets this cake apart isn’t just the ingredients—it’s the philosophy behind each step. I’ve stripped away unnecessary fuss, replaced heavy cream with a light glaze, and added a hint of lemon to brighten the berries. The result is a cake that feels like a summer memory in every bite, and it’s hands down the best version you’ll ever make at home. I dare you to taste this and not go back for seconds; the layers are so luscious, you’ll think you’re eating a cloud. The secret? A balanced ratio of flour to butter, a touch of buttermilk for moisture, and a glaze that ties everything together without overpowering the fruit.
If you’ve ever struggled to keep a cake moist or to get the glaze to set properly, you’re not alone—and I’ve got the fix. I’ll be honest—I ate half the batch before anyone else got to try it. Most recipes get this completely wrong, but here’s what actually works: use a light touch when mixing, keep the batter chilled, and let the glaze set at room temperature for a perfect sheen. Picture yourself pulling this out of the oven, the whole kitchen smelling incredible, and the first slice sliding out like a ribbon. Stay with me here—this is worth it.
What Makes This Version Stand Out
- Flavor: The combination of sweet raspberries, buttery vanilla sponge, and a citrusy glaze creates a flavor profile that is both familiar and refreshingly new. Each bite delivers a burst of berry tang balanced by subtle vanilla undertones.
- Texture: The batter is light and airy, yet dense enough to hold the layers together. The glaze adds a silky finish that doesn’t weigh the cake down.
- Simplicity: With only a handful of pantry staples, this recipe is a breeze for beginners and a reliable go-to for seasoned bakers.
- Uniqueness: The use of buttermilk and a lemon‑infused glaze gives the cake a bright, fresh twist that sets it apart from typical raspberry cakes.
- Crowd Reaction: Friends and family rave about the moist crumb and vibrant glaze, and the cake always disappears within minutes at parties.
- Ingredient Quality: Fresh, ripe raspberries and high‑quality butter make the difference between ordinary and unforgettable.
- Cooking Method: Layering the batter and letting it rest between layers ensures even rise and perfect crumb.
- Make‑Ahead Potential: The cake can be assembled a day ahead, refrigerated, and glazed just before serving for maximum convenience.
Inside the Ingredient List
The Flavor Base
The foundation of this cake starts with flour, baking powder, baking soda, and salt. Flour gives structure, while the leavening agents create lift and a tender crumb. Salt is essential for balancing sweetness and enhancing the berries’ natural tartness. If you skip any of these, the cake will either be flat or overly dense, and the flavor will suffer.
Use a fine‑sifted all‑purpose flour to avoid lumps and ensure a smooth batter. If you’re looking for a gluten‑free version, try a blend that mimics the texture of regular flour. Keep the baking powder and soda fresh; expired leavening agents can leave a metallic aftertaste and ruin the rise.
The Texture Crew
Butter, sugar, eggs, vanilla, and buttermilk form the heart of the batter. Butter adds richness and helps create a tender crumb. Sugar not only sweetens but also helps with browning. Eggs bind everything together and contribute to the cake’s structure.
Use room‑temperature butter to ensure it emulsifies properly. If you’re in a hurry, a quick melt will work, but be careful not to overheat. The buttermilk adds moisture and a slight acidity that reacts with the leavening agents, giving the cake a soft, airy texture.
The vanilla extract gives depth and warmth, while the lemon juice in the glaze brightens the overall flavor profile. Together, these ingredients produce a cake that feels luxurious without being heavy.
The Unexpected Star
Fresh raspberries are the showstopper of this cake. Their natural tartness balances the sweetness of the batter and glaze, creating a flavor that feels both sweet and refreshing. Raspberries also add a pop of color, making the cake visually stunning.
If you can’t find fresh berries, frozen raspberries work well—just thaw them and pat dry to avoid excess liquid. For an extra burst of flavor, reserve a handful of berries for the glaze; they’ll add depth and a glossy sheen.
Raspberries also contain antioxidants and vitamins that give the cake a nutritional boost. They’re a natural source of vitamin C, which helps maintain healthy skin and a strong immune system.
The Final Flourish
The glaze and frosting finish the cake, giving it a glossy, professional look and an extra layer of flavor. The glaze is made with powdered sugar, heavy cream, vanilla, and lemon juice, creating a smooth, glossy coat that’s easy to spread.
The frosting, a lighter version of the glaze, adds a creamy contrast to the buttery sponge. It’s made with a generous amount of powdered sugar, butter, and a splash of heavy cream, resulting in a silky, spreadable texture. The glaze and frosting work together to create a cake that looks as good as it tastes.
If you’re feeling adventurous, add a dash of almond extract to the glaze for a nutty undertone. This subtle twist can elevate the cake’s complexity and make it a conversation starter at dinner parties.
Everything’s prepped? Good. Let’s get into the real action.
The Method — Step by Step
- Preheat your oven to 350°F (175°C) and line two 9-inch round cake pans with parchment paper. Grease the parchment edges with butter or non‑stick spray to ensure easy release. This step is crucial; a properly greased pan means a clean, even bake.
- In a large bowl, whisk together the flour, baking powder, baking soda, and salt. Sift the dry mix once more to remove any lumps and guarantee a silky batter. The aroma of fresh flour is the first hint of the cake’s promise.
- Cream the butter and granulated sugar together until light and fluffy. This process incorporates air, which will help the cake rise. The batter should feel airy like a cloud when you stir it.
- Add the eggs one at a time, beating well after each addition. The eggs bind the batter and give structure. Be sure to fully incorporate each egg before adding the next.
- Stir in the vanilla extract and buttermilk until the mixture is smooth. The buttermilk adds moisture and a slight tang that enhances the raspberry flavor. The batter should feel silky and pourable.
- Fold in the fresh raspberries gently to preserve their shape. The berries should be evenly distributed without breaking into puree. The visual of bright red berries is a treat for the eyes.
- Divide the batter evenly between the prepared pans and tap the pans gently on the counter to release any air bubbles. The batter should level off to the top of the pans. This step ensures an even rise.
- Bake for 25–30 minutes, or until a toothpick inserted into the center comes out clean. Let the cakes cool in the pans for 10 minutes before transferring them to a wire rack to cool completely. The aroma of baking cake will fill your kitchen.
- While the cakes cool, prepare the glaze by whisking together powdered sugar, heavy cream, vanilla, and lemon juice until smooth. The glaze should be pourable but thick enough to coat the cake. The lemon juice brightens the glaze, preventing it from feeling too sweet.
- Once the cakes are cool, level the tops with a serrated knife. Place one cake layer on a serving plate and spread a thin layer of glaze over the top. This first glaze layer will seal the cake and lock in moisture.
- Add the second layer and repeat the glazing process, adding a thin layer of glaze before stacking and a final thick glaze on top. The glaze should shine like a jewel when it sets. This step is pure magic.
- Let the cake rest for at least 30 minutes before slicing to allow the glaze to set properly. The cake will feel firm to the touch once the glaze has fully set. This final step ensures each slice is as beautiful as it is delicious.
That’s it — you did it. But hold on, I’ve got a few more tricks that will take this to another level. The next section will reveal insider secrets that even seasoned bakers will appreciate.
Insider Tricks for Flawless Results
The Temperature Rule Nobody Follows
Many bakers bake at the temperature listed on the package, but the real trick is to preheat the oven for a full 15 minutes and then reduce the temperature by 10°F after placing the pans. This ensures a gentle rise and a golden crust without overbrowning. I once baked at 375°F and the cake was dry; the next time, I lowered it to 340°F, and the crumb was perfectly moist.
Why Your Nose Knows Best
The scent of a cake is a reliable indicator of doneness. When the batter is baking, the smell will shift from buttery to a subtle, sweet aroma. If it starts to smell like burnt sugar, the cake is overcooked. Trust your nose; it’s the best judge of a perfect bake.
The 5-Minute Rest That Changes Everything
After removing the cakes from the oven, let them rest in the pans for 5 minutes before transferring. This brief rest allows the cake to set, preventing it from cracking or sliding off the pan. I’ve seen cakes that cracked instantly when moved too early; this trick saves the day.
Keeping the Glaze Smooth
If the glaze is too thick, add a splash of heavy cream or milk to thin it out. Conversely, if it’s too runny, whisk in a little more powdered sugar. The glaze should coat the cake like a fine silk veil.
Layering the Berry Flavor
Reserve a handful of fresh raspberries for the glaze. They’ll add depth and a glossy finish to the cake. I’ve used this trick at parties, and the cake looks like a jewel on the table.
Creative Twists and Variations
Chocolate Raspberry Layer Cake
Swap half the butter for melted dark chocolate and add a tablespoon of cocoa powder to the batter. The chocolate will complement the raspberry’s tartness, creating a decadent dessert. Chocolate lovers will adore this version.
Minty Raspberry Delight
Add a teaspoon of fresh mint leaves to the batter and a dash of peppermint extract to the glaze. The mint will add a cool, refreshing note that pairs beautifully with the berry. This is perfect for summer gatherings.
Almond Raspberry Cake
Replace half the flour with ground almonds and add a tablespoon of almond extract to the glaze. The nutty undertone gives the cake a subtle depth that’s both comforting and sophisticated. It’s a great option for those with a love for nutty desserts.
Salted Caramel Raspberry Cake
Drizzle a salted caramel sauce over the glaze before it sets. The caramel’s sweetness balances the raspberry’s tartness, and the sea salt adds a delightful contrast. This twist turns the cake into a gourmet treat.
Vegan Raspberry Layer Cake
Use coconut oil instead of butter, replace the eggs with flaxseed meal, and use a plant‑based milk. The texture will be slightly denser, but the flavor remains vibrant. This version is perfect for plant‑based bakers.
Mini Raspberry Cheesecake Layer Cake
Add a layer of creamy cheesecake between the sponge layers. Mix cream cheese with a little sugar and lemon zest for a tangy filling. The combination of cheesecake and raspberry creates a luxurious, bite‑sized dessert.
Storing and Bringing It Back to Life
Fridge Storage
Wrap the cooled cake tightly in plastic wrap and store it in an airtight container in the refrigerator. The cake will stay fresh for up to 5 days, and the glaze will remain glossy. When you’re ready to serve, let the cake sit at room temperature for 20 minutes to soften the glaze slightly.
Freezer Friendly
For longer storage, wrap the cake in parchment paper and then in foil before freezing. It will keep for up to 3 months. Thaw overnight in the refrigerator, then allow it to come to room temperature before serving. This method preserves the cake’s moisture and flavor.
Best Reheating Method
To revive a refrigerated cake, place it in a preheated oven at 300°F for 10 minutes. This gentle heat restores the cake’s softness without drying it out. Add a splash of water to the bottom of the pan to create steam, which keeps the cake moist and the glaze from cracking.
If you’re in a hurry, a quick microwave of 15–20 seconds will warm the cake, but be careful not to overheat. The glaze may soften, so let the cake cool for a minute before slicing. With these storage tips, you’ll always have a fresh, delicious cake ready to impress.
And that’s the full recipe. I’ve poured my heart into every step, and I’m confident that you’ll love it as much as I do. Grab your apron, gather the ingredients, and let’s bake a masterpiece that will wow everyone at your next gathering. Trust me—this cake will become a staple in your baking repertoire.