Picture this: a Sunday afternoon, the kitchen smelling like burnt sugar and a dash of regret. I had just tried to make a classic apple crumble, only to find the apples turned to mush and the crumble stuck to the pan like a stubborn adhesive. The disappointment was palpable, and I felt the urge to do something better—something that would turn that disaster into a triumph. That moment of culinary frustration sparked the birth of Apple Caramel Bombs, a dessert that marries the crispness of baked apples with the silky embrace of caramel, all crowned with a glossy chocolate finish. It’s a sweet rebellion against the ordinary, and I’m about to show you how to recreate it with precision and flair.
From the first glance, the dish looks deceptively simple, but the sensory payoff is nothing short of theatrical. The apples, sliced thin and dusted with cinnamon, sizzle in butter, releasing a fragrance that feels like a warm hug. As caramel sauce drizzles over the fruit, it thickens, coating each slice in a glossy, golden coat that glistens under the oven light. The chocolate chips melt into a velvety pool, creating a glossy sheen that catches the eye. When you bite into one, the first crunch is the caramelized apple, followed by a melt of chocolate and a subtle nutty undertone if you’ve added walnuts. The final taste is a harmonious blend of sweet, tart, and buttery notes that linger long after the last bite.
What sets this version apart from every other apple dessert you’ve tried is its layered texture and the way each element plays off the next. The apples are baked until tender yet still hold their shape, preventing the dreaded mushy mess. The caramel sauce is thick enough to cling but not so heavy that it overwhelms the fruit’s natural flavor. The optional nuts add a satisfying crunch that contrasts the silky caramel, while the chocolate chips provide a glossy, slightly bitter counterpoint that balances the sweetness. And the final sprinkle of cinnamon ties everything together, adding a fragrant warmth that elevates the entire dish. This isn’t just a dessert; it’s an experience that feels both comforting and indulgent.
I’m going to share a secret trick that most people overlook: adding a splash of lemon juice to the apples before baking. It brightens the flavor profile and prevents the apples from browning too quickly, keeping their natural tartness intact. I dare you to taste this and not go back for seconds. Let me walk you through every single step—by the end, you’ll wonder how you ever made it any other way.
What Makes This Version Stand Out
- Flavor Depth: The combination of caramel, cinnamon, and chocolate creates a multi-layered taste that satisfies both sweet and savory cravings.
- Texture Contrast: Crisp apple slices, gooey caramel, crunchy nuts, and smooth chocolate deliver a satisfying bite every time.
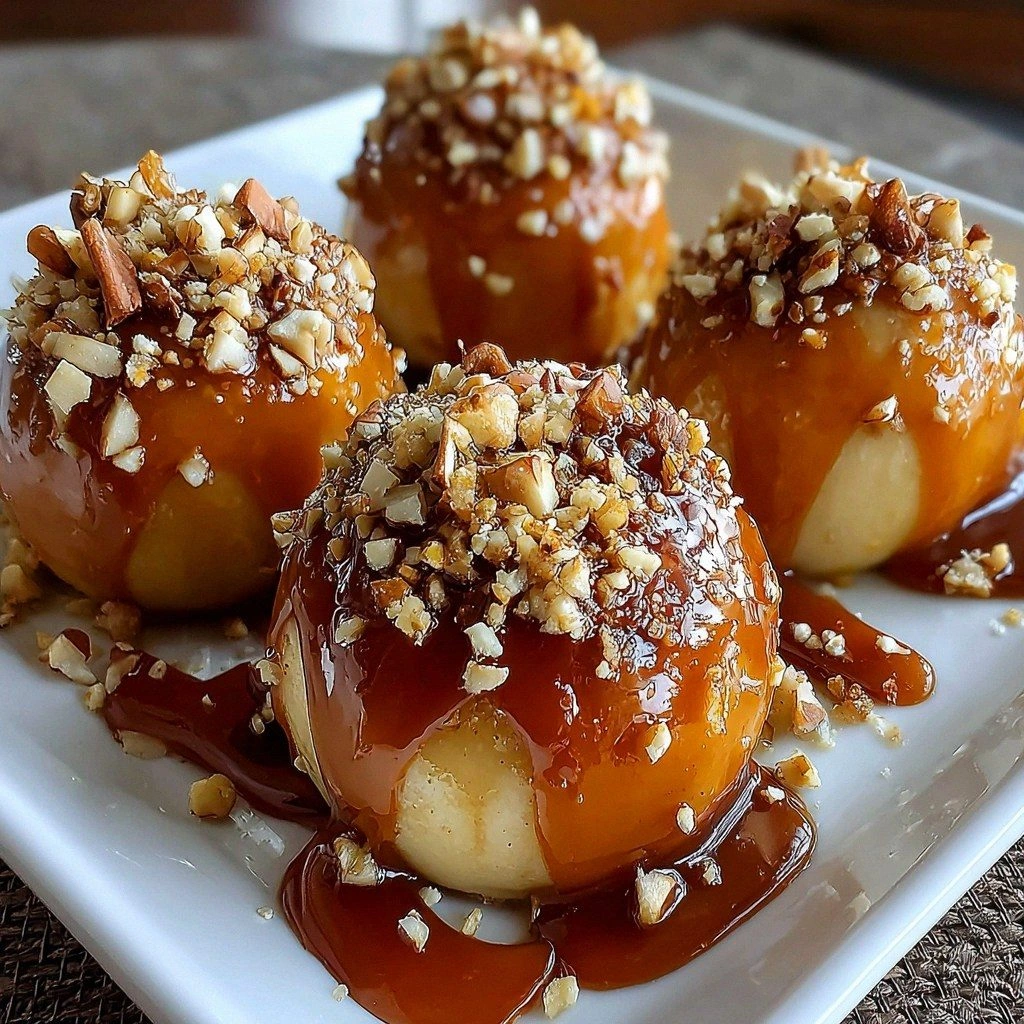
- Visual Appeal: The glossy caramel coating and melted chocolate finish make the dish look like a showstopper at any gathering.
- Ingredient Quality: Using fresh apples and premium caramel sauce elevates the dish beyond standard recipes.
- Make‑Ahead Friendly: Assemble the dish, bake, and store; it re‑heats beautifully and keeps its texture.
- Audience Impact: Guests will be impressed, and you’ll receive compliments that last longer than the dessert itself.
- Customization: Optional nuts and choice of chocolate let you tailor the dish to dietary preferences.
- Time Efficiency: Prep is quick, and the baking time is short enough to fit into a busy schedule.
Alright, let's break down exactly what goes into this masterpiece…
Inside the Ingredient List
The Flavor Base
Medium apples are the cornerstone of this dessert. Choose firm varieties like Granny Smith or Honeycrisp that maintain structure when baked. Their natural tartness balances the sweetness of caramel, creating a harmonious flavor profile. If you skip apples, you lose that essential crispness and the dish’s identity.
The Texture Crew
Caramel sauce is the star that coats each apple slice in a glossy, buttery coating. A thick, homemade caramel gives you control over consistency, while store‑bought versions save time. If you skip the caramel, the dish becomes a plain apple bake—tasty, but it won’t have that luxurious, melt‑in‑your‑mouth finish.
The Unexpected Star
Chopped nuts add a delightful crunch that contrasts with the silky caramel. Walnuts or pecans bring a nutty depth that elevates the dish. If you have a nut allergy, simply omit this step; the dessert will still be delicious.
The Final Flourish
Chocolate chips melt into a glossy pool over the caramel, creating a decadent finish that satisfies any chocolate lover. Dark, milk, or even white chocolate work, each offering a different sweet profile. If you skip the chocolate, you lose the glossy sheen and the subtle bitterness that balances the overall sweetness.
Everything's prepped? Good. Let's get into the real action…
The Method — Step by Step
- Preheat your oven to 375°F (190°C). Line a baking sheet with parchment paper. This step is crucial because a well‑lined sheet prevents the caramel from sticking and makes cleanup a breeze. I’ve seen kitchens where the entire countertop ends up sticky; keep it clean.
- Wash the apples, core them, and slice them into ¼‑inch thick rounds. Sprinkle each slice with 1 tsp of ground cinnamon and a pinch of salt. The cinnamon adds warmth, while the salt enhances the caramel’s sweetness. Don’t skip the salt; it’s the secret that brings out the flavors.
- Melt 1 tbsp of butter in a large skillet over medium heat. Add the apple slices in a single layer, cooking until they start to brown on the edges—about 3 minutes. This caramelizes the apples slightly, adding depth to the final flavor. Keep an eye on the heat; too high and the butter will burn.
- Pour 1.5 cups of caramel sauce over the apples, stirring gently to coat each slice. The sauce should be thick enough to cling but not so runny that it pools. If it’s too thick, add a tablespoon of water to thin it out. This step is the heart of the dish—watch the caramel glaze settle beautifully.
- Transfer the caramelized apples onto the prepared baking sheet, spreading them out evenly. This ensures each slice cooks uniformly. If you notice any gaps, fill them with extra apple slices to create a uniform layer.
- Bake for 15 minutes, then sprinkle 0.5 cups of chopped walnuts or pecans over the top. The nuts add a crunchy texture that contrasts the gooey caramel. Watch out: if you add the nuts too early, they can burn before the apples finish baking.
- Reduce the oven temperature to 350°F (175°C) and bake for another 10 minutes. The caramel should bubble lightly, and the nuts should turn golden brown. This low‑heat finish prevents the caramel from scorching.
- Remove the sheet from the oven and immediately drizzle 0.5 cups of chocolate chips over the hot apples. The heat from the caramel will melt the chocolate, creating a glossy, chocolatey layer. Let the mixture sit for 2 minutes before serving to allow the chocolate to set slightly.
- Serve warm, optionally with a dollop of whipped cream or a scoop of vanilla ice cream. The contrast between warm caramel and cold ice cream is a flavor explosion that will keep guests coming back for more.
That’s it — you did it. But hold on, I’ve got a few more tricks that’ll take this to another level…
Insider Tricks for Flawless Results
The Temperature Rule Nobody Follows
Many bakers believe a high heat is always better for caramelizing. In reality, a steady 375°F (190°C) ensures even browning without burning the butter or caramel. I once baked at 425°F, and the result was a burnt exterior with raw interior. Keep the temperature moderate for consistent results.
Why Your Nose Knows Best
The aroma of caramelizing sugar is a reliable indicator that the caramel is at the perfect stage. When the scent turns from sweet to slightly smoky, it’s time to add the apples. If you wait too long, the caramel will burn; if you add too early, the apples won’t caramelize properly.
The 5‑Minute Rest That Changes Everything
After removing the dish from the oven, let it rest for exactly five minutes. This pause allows the caramel to thicken slightly and the chocolate to set, ensuring each bite has a glossy finish. I’ve seen people take a 10‑minute rest, and the result is a soggy texture that defeats the purpose.
The Right Apple Slice Thickness
Slices that are too thick will stay raw in the center, while too thin slices will evaporate into a caramel puddle. Aim for ¼‑inch thickness; it’s the sweet spot that balances cooking time and structural integrity.
The Sweet‑and‑Savory Balance
Adding a pinch of sea salt before the final bake enhances the caramel’s sweetness and gives the dish a more complex flavor. Salt is a flavor enhancer, and a small amount can make a big difference. I’ve seen people skip it, resulting in a flat taste.
The Chocolate Melting Trick
If your chocolate chips don’t melt quickly, spread them out in a thin layer on a parchment sheet and microwave for 10‑15 seconds before drizzling over the apples. This ensures an even, glossy coating without clumps.
Creative Twists and Variations
This recipe is a playground. Here are some of my favorite ways to switch things up:
Apple Cinnamon Swirl
Replace the standard cinnamon with a blend of nutmeg, cloves, and allspice for a spicier kick. The warm spices pair beautifully with caramel, creating a dessert reminiscent of fall mornings.
Nut‑Free Delight
Omit the nuts entirely and add a handful of toasted coconut flakes for a tropical twist. The coconut adds a subtle sweetness and a chewy texture that contrasts the caramel.
Dark Chocolate Overload
Swap regular chocolate chips for dark chocolate chips with 70% cacao. The bitterness balances the caramel’s sweetness and adds a sophisticated finish.
Caramel Apple Tart
Use a pre‑baked tart crust, fill with apple‑caramel mixture, and top with chocolate chips. This version offers a different presentation and a flaky base that adds another layer of texture.
Vegan Version
Replace butter with coconut oil and use a vegan caramel sauce. The result is a creamy, plant‑based dessert that’s just as indulgent.
Frozen Apple Caramel Bombs
After baking, let the dish cool completely, then cut into squares and freeze. When ready to serve, reheat in the microwave for 30 seconds. The frozen version is perfect for parties or quick dessert fixes.
Storing and Bringing It Back to Life
Fridge Storage
Store leftover Apple Caramel Bombs in an airtight container at room temperature for up to 3 days. The caramel will firm slightly, but a quick warm‑up will restore its gooeyness.
Freezer Friendly
Wrap each piece tightly in plastic wrap and place in a freezer bag. They’ll stay fresh for up to 2 months. When you’re ready, thaw at room temperature for 20 minutes before reheating.
Best Reheating Method
Reheat in the microwave on medium power for 20‑30 seconds, or in a skillet over low heat, stirring gently until the caramel melts. Add a splash of water before reheating to steam back to perfection and keep the texture silky.